View Loan Documents
To send a new document to the client for signature, follow the steps below.
1. Create the Override page – View loan documents page in the Site Builder.

2. Go to the admin panel (your domain name/admin). For example, https://student-loan.aws.neofin.global/admin/
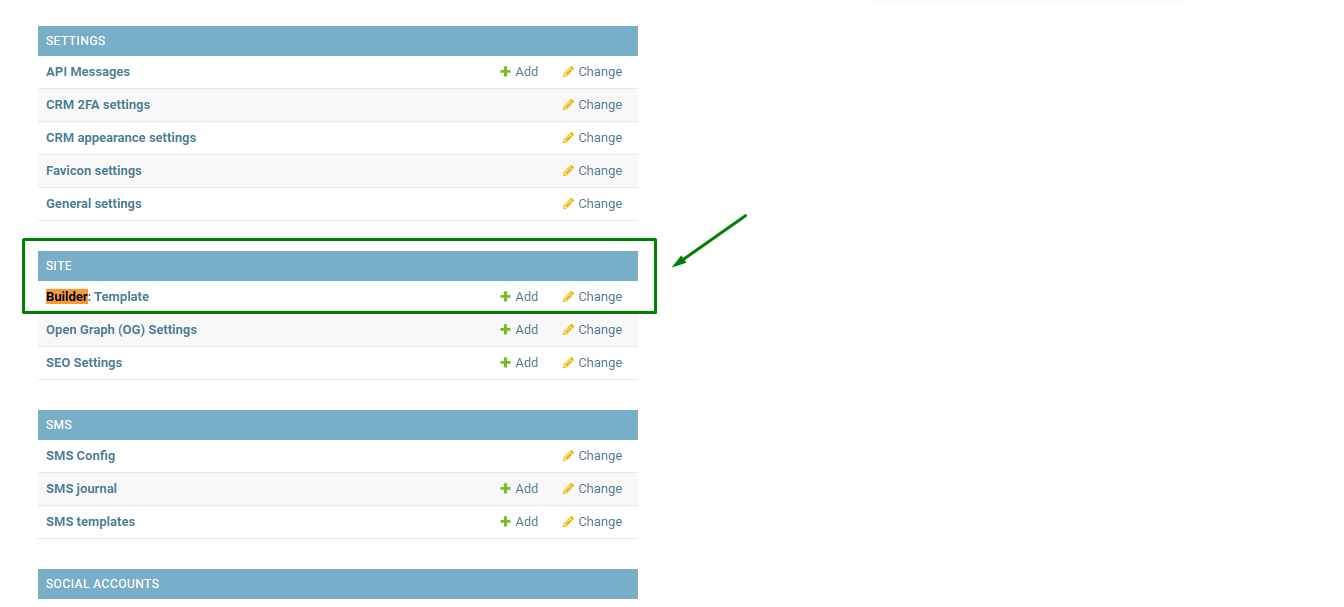
3. Press Ctrl+F for a quick search and type Builder in the search bar. Go to the Builder section: Template
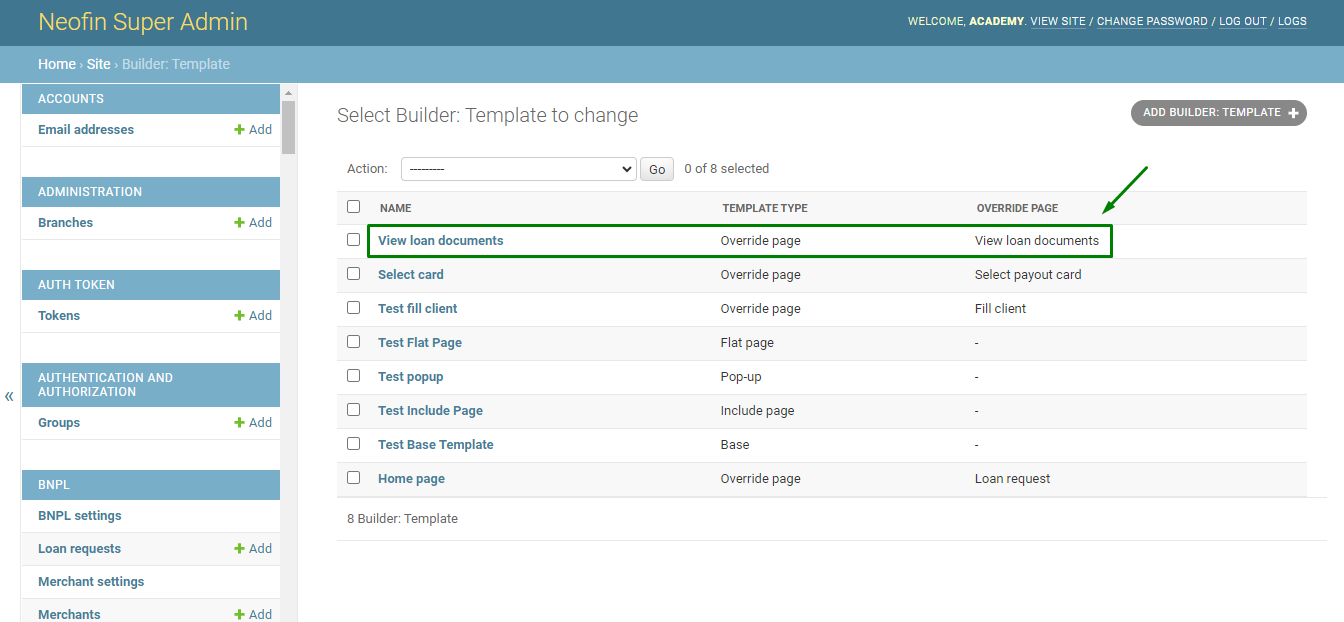
4. In the list of pages, click the View loan documents page that you created at the step 1.
5. In the Components field, add the following code:
{"pages": [{"id": "D0YACiYI3bW5WSGg", "type": "main", "frames": [{"component": {"type": "wrapper", "stylable": ["background", "background-color", "background-image", "background-repeat", "background-attachment", "background-position", "background-size"], "attributes": {"id": "inmw"}, "components": [{"classes": ["text-gray-600", "body-font"], "tagName": "section", "components": [{"type": "template-tag", "attributes": {"id": "inh7x", "tag_name": "load", "tag_attrs": "document_sign"}}, {"type": "content-block", "style": "", "attributes": {"id": "i8z4j", "block": "content"}, "components": [{"classes": ["lg:px-5", "lg:py-24"], "components": [{"classes": ["flex", "flex-wrap", "items-center", "justify-center"], "components": [{"classes": ["w-full", "lg:w-9/12"], "attributes": {"id": "iy8gg8"}, "components": [{"classes": ["p-8", "flex", "flex-col", "w-full", "mt-10", "md:mt-0", "bg-white"], "components": [{"type": "text", "classes": ["text-lg", "font-medium", "title-font", "text-center", "mb-5", "pb-5", "text-blue-900", "border-b-2", "border-blue-900"], "tagName": "h2", "components": [{"type": "textnode", "content": "\n Your Contract and ACH Authorization\n "}]}, {"type": "text", "classes": ["text-xs", "text-gray-500", "mb-5"], "tagName": "p", "components": [{"type": "textnode", "content": "\n To finish we need to confirm that you agree to the terms and\n conditions of the credit agreement. You have no "}, {"void": true, "tagName": "br"}, {"type": "textnode", "content": "obligation to\n pay the agreement you sign until after the described procedure is\n completed. Your first scheduled monthly "}, {"void": true, "tagName": "br"}, {"type": "textnode", "content": "payment will be due\n 30 days after the procedure is completed.\n "}]}, {"type": "text", "classes": ["text-xs", "font-medium", "mb-5"], "tagName": "p", "components": [{"type": "textnode", "content": "\n Please scroll to the bottom to review and then sign this credit\n agreement.\n "}]}, {"type": "template-tag", "attributes": {"id": "ibxf6", "tag_name": "for", "tag_attrs": "document in documents"}, "components": [{"classes": ["w-full", "mb-5", "border", "max-h-96", "overflow-y-auto"], "attributes": {"id": "ingxh"}, "components": [{"type": "text", "attributes": {"id": "iq6j5"}, "components": [{"type": "text", "tagName": "span", "attributes": {"id": "i2jte"}, "components": [{"type": "textnode", "content": "{{ document.html|safe }}"}], "savedStyle": {"text-align": "center"}}], "savedStyle": {"padding": "10px"}}]}]}, {"type": "template-tag", "attributes": {"id": "ihsgi", "tag_name": "get_sign_managers", "tag_attrs": "signature as sign_managers"}}, {"type": "template-tag", "attributes": {"id": "izpah", "tag_name": "for", "tag_attrs": "sign_manager in sign_managers"}, "components": [{"classes": ["flex", "flex-col", "items-center"], "attributes": {"id": "i0ayf"}, "components": [{"text": "Sing with {{ sign_manager.PROVIDER_NAME }}", "type": "button", "classes": ["text-white", "border-0", "py-2", "px-8", "focus:outline-none", "rounded", "text-lg", "bg-stately"], "attributes": {"id": "{{ sign_manager.BUTTON_ID }}", "type": "button"}, "components": [{"type": "textnode", "content": "Sing with {{ sign_manager.PROVIDER_NAME }}"}]}, {"type": "text", "attributes": {"id": "insti"}, "components": [{"type": "textnode", "content": "{{ sign_manager.render_html_extra }}"}], "savedStyle": {"padding": "10px"}}]}]}]}]}]}]}]}]}]}}]}], "assets": [], "styles": [{"style": {"width": "100%", "display": "table", "padding-top": "10px", "padding-left": "10px", "padding-right": "10px", "padding-bottom": "10px"}, "selectors": [{"name": "row", "private": 1}]}, {"style": {"width": "100%", "display": "block"}, "mediaText": "(max-width: 768px)", "selectors": [{"name": "cell", "private": 1}], "atRuleType": "media"}, {"style": {"width": "100%", "display": "block"}, "mediaText": "(max-width: 768px)", "selectors": ["cell30"], "atRuleType": "media"}, {"style": {"width": "100%", "display": "block"}, "mediaText": "(max-width: 768px)", "selectors": ["cell70"], "atRuleType": "media"}, {"style": {"width": "8%", "height": "75px", "display": "table-cell"}, "selectors": [{"name": "cell", "private": 1}]}, {"style": {"min-height": "100px"}, "selectors": ["#i8z4j"]}, {"style": {"padding": "10px"}, "selectors": ["#iq6j5"]}, {"style": {"text-align": "center"}, "selectors": ["#i2jte"]}, {"style": {"padding": "10px"}, "selectors": ["#insti"]}]}

6. Click Save.

7. In the Site Builder, go to the editor’s mode on the View loan documents page.
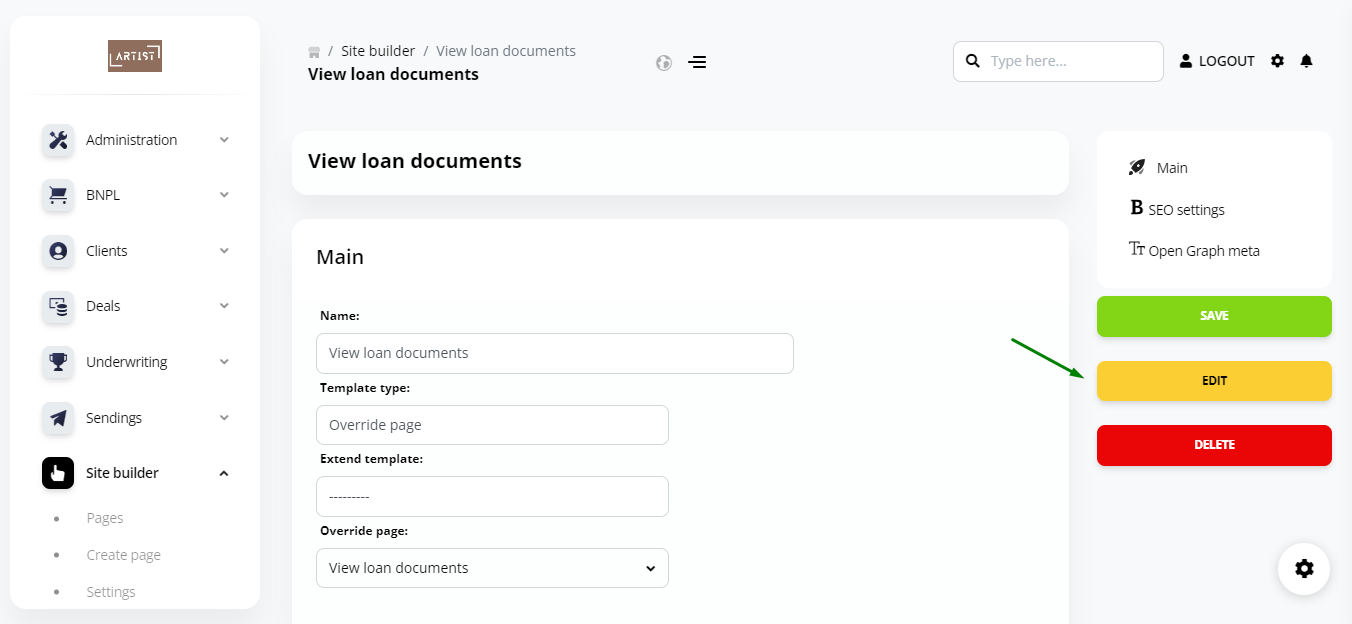
8. You will see the preset text and fields for signing the document.
The following structure is used for displaying the document:
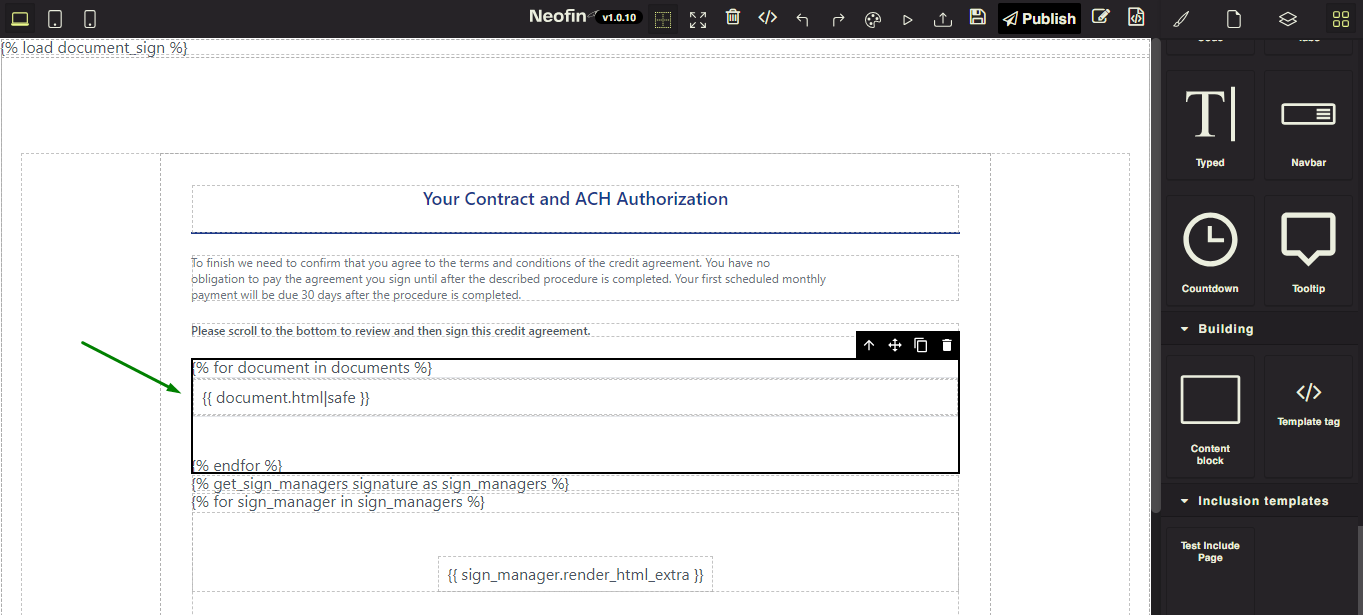
All active documents associated with the Loan are automatically displayed here.

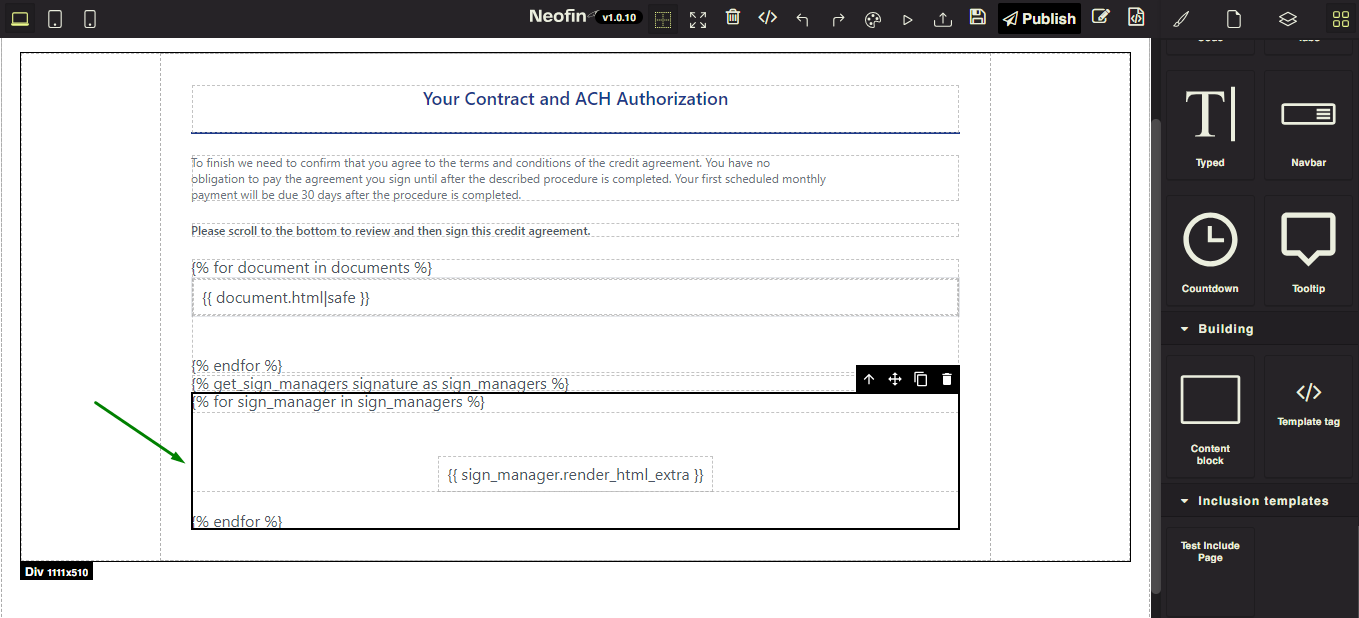
The following structure is used for signing the document:
9. To add the signing option, you need to choose a provider or configure the integration with your service. You can do it in the Settings – Documents – Sign Settings tab.

So, after following the steps above, you will get a customized page where the client can sign the document.
After signing, the user ends up on the Loan signed page. It informs the client that the document has been signed and he/she just have to wait for the money to come in. To configure the content of this page, you need to create and edit the Override page – Loan signed page in the Site Builder.
Let’s look at the case when a client signs a document offline, for example, in your organization’s branch.
1. Go to Deals – Loans, and then select a specific Loan.
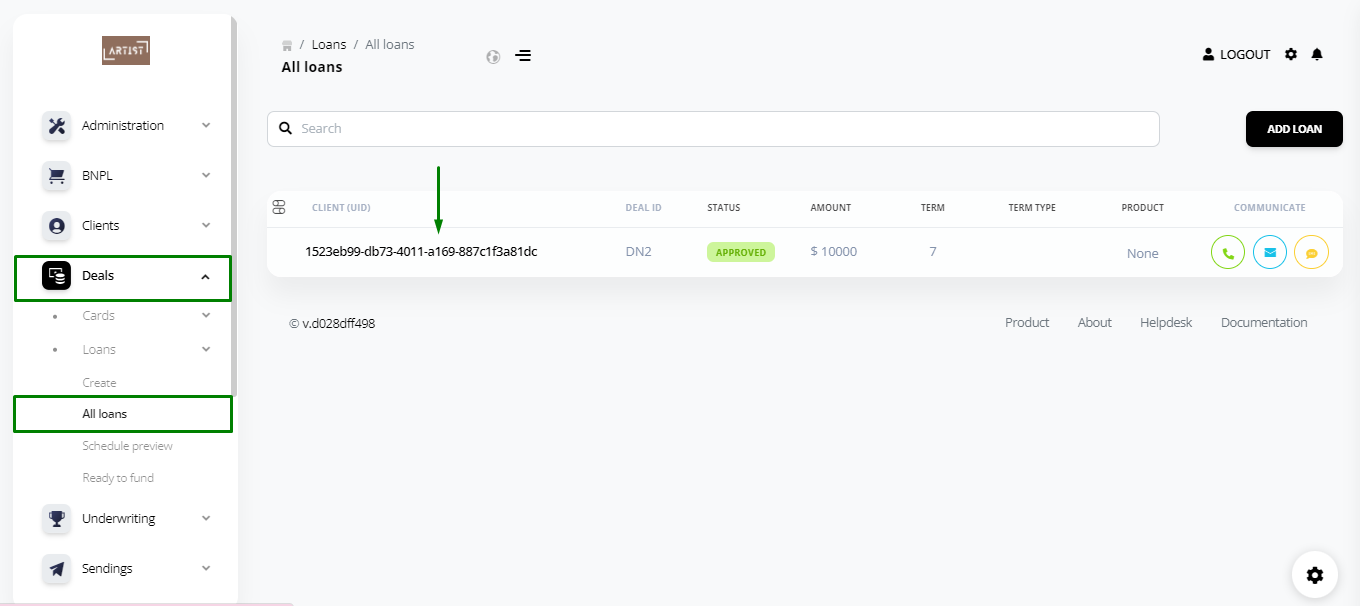
2. The Printing Forms section will display the document file that was automatically generated.

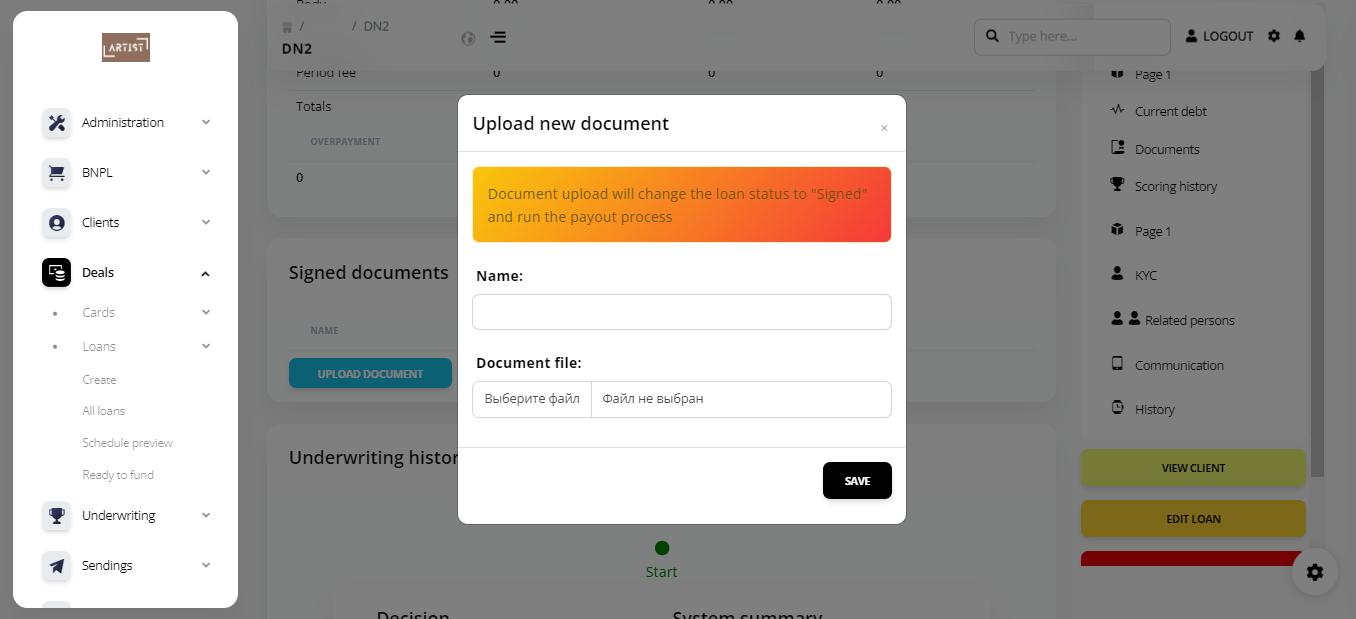
This document is already filled out. All you have to do is print it out, send it to the client for signature, then scan and upload it into the system. Click Upload document.
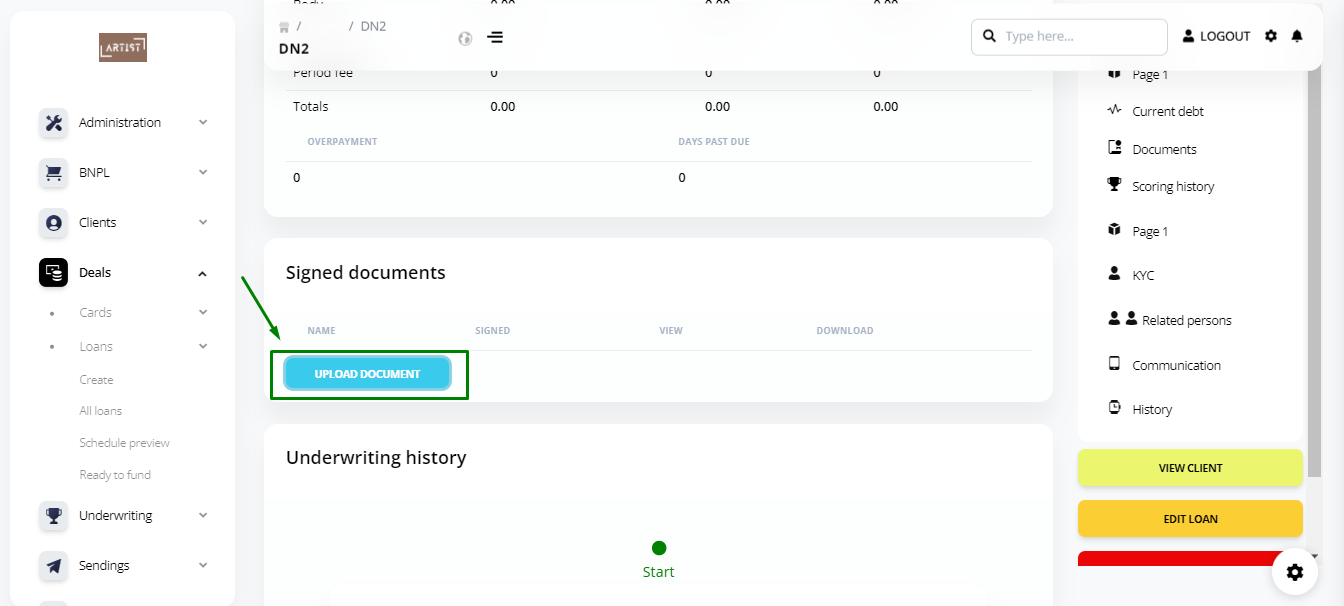
Select the file (the document signed by the client) and click Save. Please note that after this action, it will be considered that the document is signed by both parties.